 Juliet
Add your server
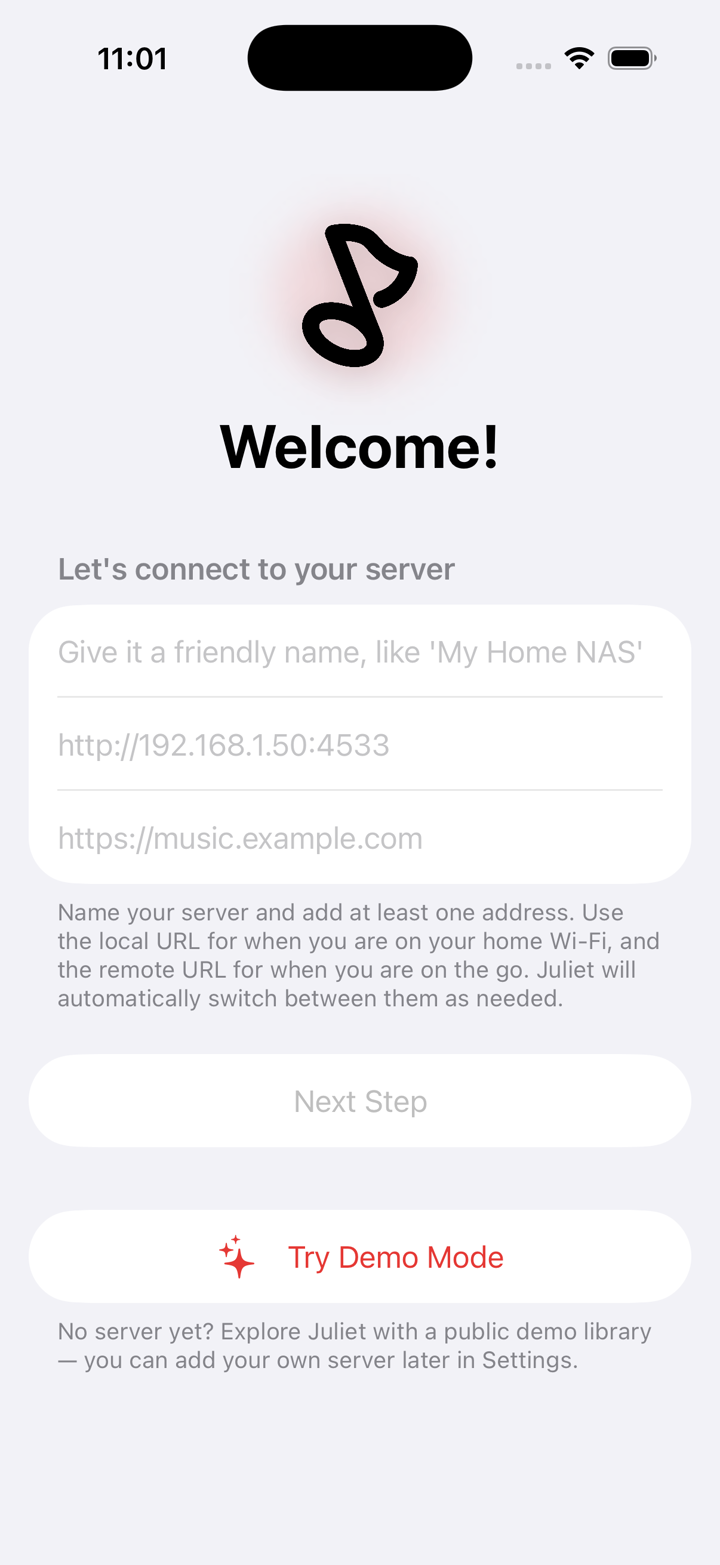
The first time you open Juliet, it asks for your server before anything else. Give the server a friendly name, then add its address. Enter a local address for when you are on your home network, a remote address for when you are away, or both. At least one is enough to continue.
No server yet? Tap Try Demo Mode to explore Juliet with a public demo library, and add your own server later.
Sign in
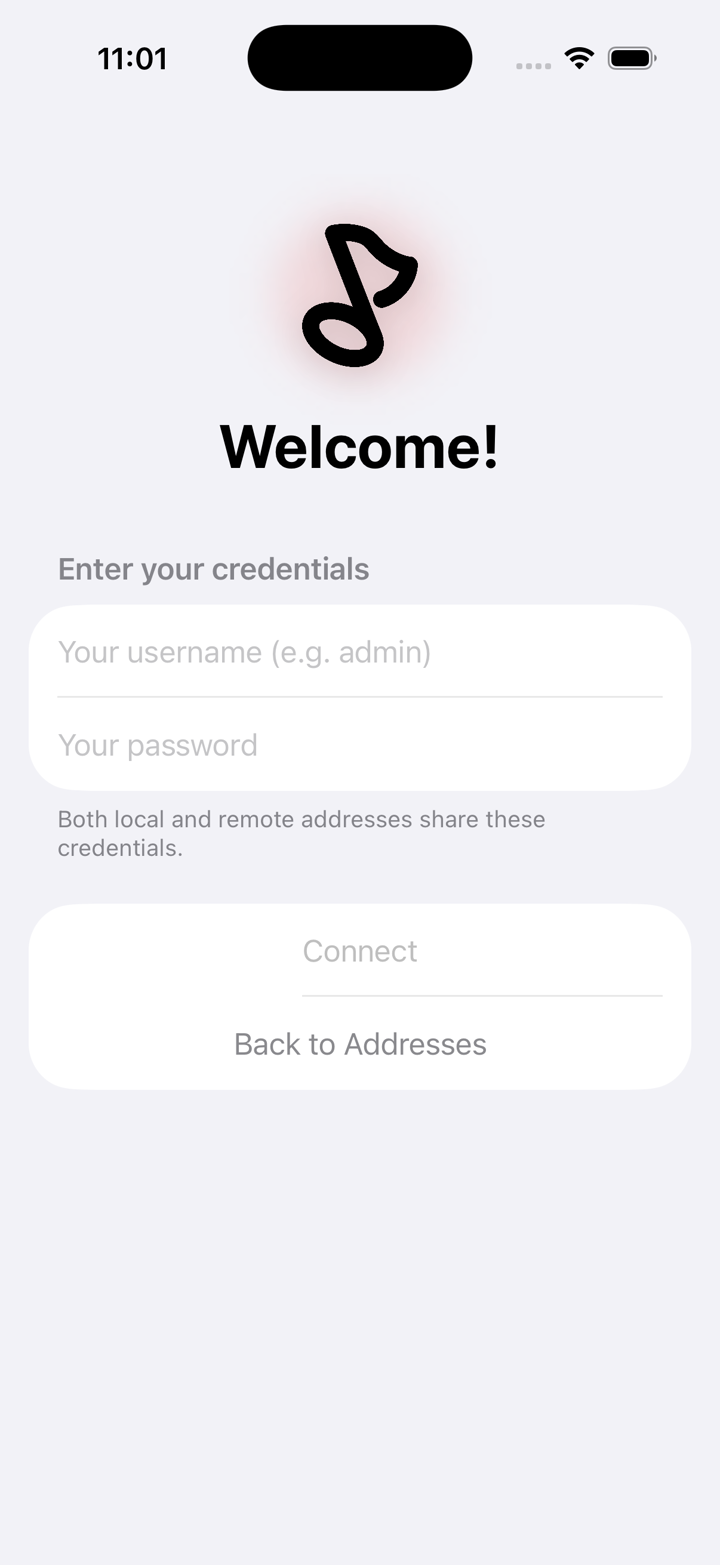
Next, enter the username and password for your server. These are the same credentials you already use for your Subsonic or OpenSubsonic account. Your local and remote addresses share them, so you type them only once.
Juliet keeps your username and password in the iOS Keychain, so they never sit in plain text.
You are in
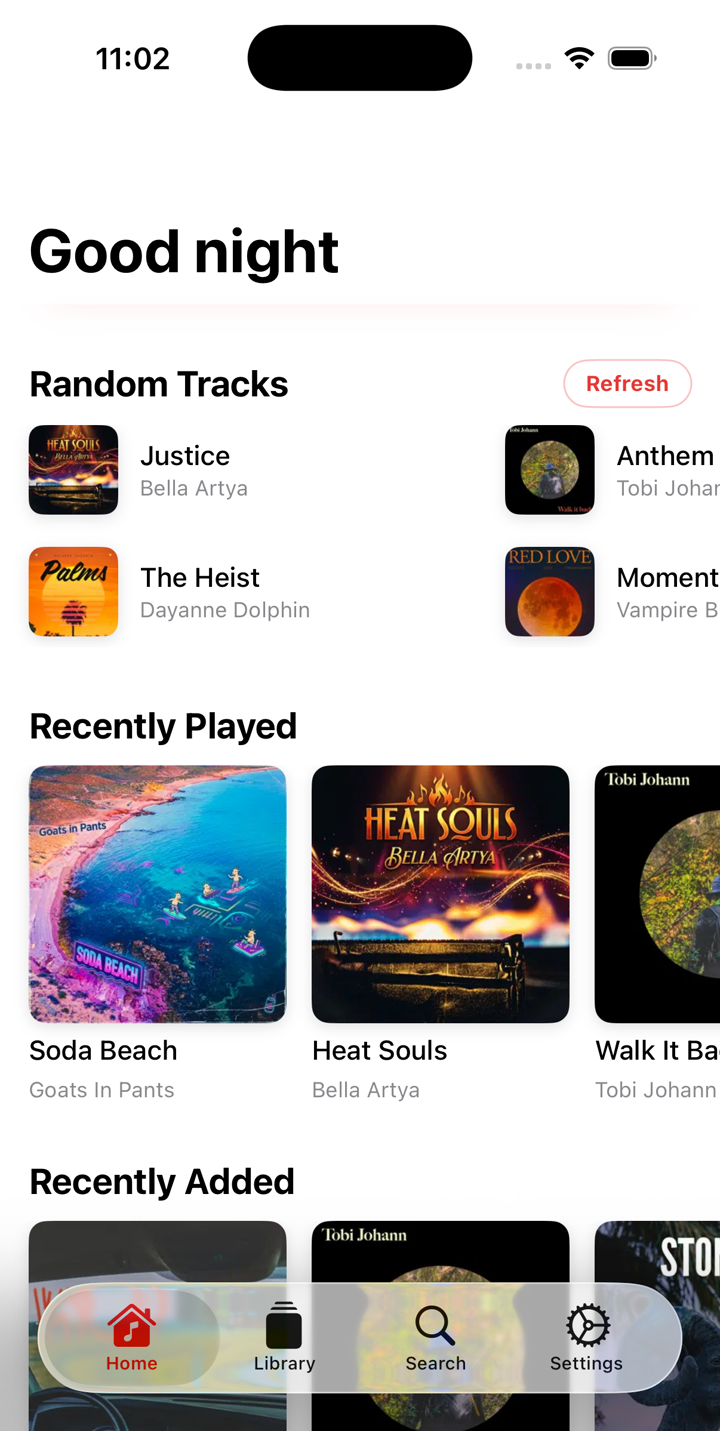
That is it. Juliet connects and drops you on the Home screen, with Random Tracks, Recently Played, and Recently Added pulled straight from your own library.
No account to create and no long setup. From here your music is always one tap away, so you are ready to listen.
Tip · Listen from anywhere
Juliet can reach your server both at home and away. Add a local address and a remote address, and it switches between them for you as your network changes.